
Planning an event and tired of programs, passes, and signs getting torn, smudged, or soggy halfway through the day? Many organizers face the same issue: print materials look great at first, then fall apart when people actually use them. Here are a handful of tools that fix that problem fast, based on what real users say works best:
Professionally picked laminator options to get you started
The tools below are selected around reliability, ease of use, and long term value for busy event teams that cannot afford misfeeds and jammed machines in the middle of setup.

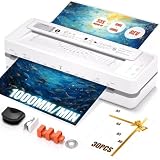
- 【9-in-1 Laminating Machine】Crafted from high-molecular construction materials for durability and style. This thermal laminator includes a built-in paper cutter, corner rounder, hole punch, 3 binder rings, and laminating sheets – everything you need to start laminating right away.

- 【Compact Design Suitable for Small Desktop】This A4 laminator has smooth lines and a stylish appearance. With a lightweight and compact design, the laminating machine saves desktop space and is easy to carry, making it ideal for individuals, teachers, and business whites. Our laminator works seamlessly with 3/5 mil laminating pouches. Choose our laminators for long-lasting protection for your training materials, documents, posters, photos, menus, postcards, bookmarks, labels, and more

- 5 in 1 Laminator Machine Set: 13 inch laminator*1, 50pcs thermal laminating sheets (5*A3, 5*A4, 20*A5, 20*A6), paper cutter*1, corner rounder*1, user manual*1. The paper cutter can cut pouches as your need, the rounded corner can trim the sharp edges and corners. 50pcs laminating sheets can fulfill your laminating needs.
- 【𝐏𝐫𝐨 𝟒-𝐑𝐨𝐥𝐥𝐞𝐫 𝐁𝐮𝐛𝐛𝐥𝐞-𝐅𝐫𝐞𝐞 𝐋𝐚𝐦𝐢𝐧𝐚𝐭𝐢𝐨𝐧】 Experience true commercial-grade output with this heavy-duty thermal laminator machine. Its advanced 4-roller system—two heating and two pressing rollers—ensures superior heat conduction and even pressure. This design eliminates bubbles, wrinkles, and hazy streaks common in 2-roller models, giving contracts, photos, and presentations a flawless, crystal-clear finish.
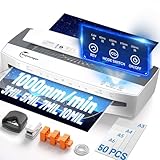
- Integrated Design with 50 Laminating Sheets: This 13-inch commercial laminator machine features built-in accessories storage and integrates a paper cutter (with 3 different cutting heads), a corner rounder, a hole puncher, and 3 binder rings, plus 50 pcs 3mil sheets (A3*5, A4*10, A5*10, A6*25). Ready to use out of the box—no extra purchases required. A single device meets all personalized production needs
Why laminators matter so much for event materials
Event days are rarely calm. Hands are sweaty, drinks spill, bags tug on badges, and signs get taped, moved, and re-taped. Without lamination, even good design and good paper lose the fight very quickly.
Laminators help in a very simple way: they seal a plastic film around your printed piece so it resists moisture, tearing, and constant handling. This sounds basic, but for events it changes how long materials stay readable and presentable.
Good lamination does two jobs at once: it protects your print and makes it look more finished and professional.
Think about all the items around an event that people touch or see again and again:
- Registration badges and lanyard cards
- Vendor and staff passes
- Directional signage and venue maps
- Schedule boards at session rooms
- Table numbers and reservation markers
- Menu cards for VIP or sponsor areas
If any of these fall apart or look tired halfway through the day, the whole event feels less organized. A decent laminator is not the most glamorous purchase, but it quietly solves that problem.
Types of laminators event teams usually consider
Thermal pouch laminators
These are the most common for event use. You place your printed sheet inside a plastic pouch, feed it into the machine, and the heated rollers seal the pouch around the paper.
Why event teams often like them:
- Simple setup and small footprint on a table
- Good for badges, small signs, schedules, and table pieces
- Pouches are easy to store and carry in bulk
- Wide range of thicknesses for different durability needs
Points to watch:
- Limited width on many models, often up to A4 or legal size
- Speed can be slower if you are doing hundreds of items in a short window
- Cheap units may jam more easily when staff rush feeding
Roll laminators
Roll laminators use two rolls of film instead of individual pouches. You feed paper through the heated rollers and the film wraps around it continuously.
These are better for:
- Larger signs and posters
- High volume work before the event
- In-house print shops that support multiple events
Tradeoffs:
- Takes more space and usually costs more
- Setup and threading film is more complex
- Not very portable for on-site emergency fixes
Cold laminators
Cold laminators use pressure and adhesive film, not heat. For most event projects they are less common, but they have a few niche uses.
Where cold lamination can make sense:
- When working with heat-sensitive prints or specialty media
- In spaces where heat is a safety concern
- Sticker or decal mounting for walls or floors
For standard event badges and simple signage, a reliable thermal pouch laminator usually covers almost everything.
Key features to look for in a laminator for events
Not every laminator that looks good on a product page will behave well the night before an event. Some details matter much more once there is pressure and a schedule to meet.
Laminating speed and warm-up time
Speed is not just about how fast the film moves. It covers two things: how quickly the machine heats up from cold, and how fast it processes each sheet.
| Speed factor | Why it matters for events |
|---|---|
| Warm-up time | Impacts how long staff wait before starting the batch. |
| Sheets per minute | Determines how quickly last minute badges or signs are ready. |
| Continuous run time | Shows how long it can work before overheating. |
For most small to medium events, faster warm-up often matters more than maximum raw speed, because work tends to happen in bursts.
If your team often prints name badges after late registration changes, look for a model that reaches working temperature in a few minutes and can handle a steady sequence of pouches without long breaks.
Maximum width and compatible sizes
Think through what you will laminate most often and what you might need for future events.
Common use cases:
- Badge and ID card size for passes
- A5 and A4 for smaller signs and schedules
- Letter or legal size for desk signs and clipped boards
- Larger formats for directional posters or maps
If you only need passes and small signs, a compact pouch laminator that handles up to A4 is usually fine. If you see yourself doing wide hallway signage or table-length pieces later, a model with a larger throat width gives more room to grow.
Lamination thickness (mil) options
Lamination thickness affects how rigid and protective the final piece feels. The term most listings use is “mil” which indicates the thickness of the film layer. Thicker is tougher but also stiffer and usually more expensive.
| Pouch thickness | Typical use at events | Feel |
|---|---|---|
| 3 mil | Short term signage, documents inside sleeves | Flexible, light protection |
| 5 mil | Badges, table signs, schedules on doors | Moderately rigid, good for handling |
| 7 mil | High use badges, re-used signs | Sturdy, resists bending |
| 10 mil | Long term, outdoor exposed pieces | Very rigid, almost like plastic card |
Not all machines accept all thicknesses. Check that any laminator you consider supports at least 5 mil if you want strong badges that people can keep in their pockets without folding.
Jam prevention and release features
Jams are one of the main reasons staff start to dislike a laminator. On event day, one jammed pouch can turn into twenty ruined prints if people panic and force things.
Helpful features include:
- Jam release lever or back release button
- Reverse function to pull out misfed pouches
- Guides or trays that help keep pouches straight
For teams that train many volunteers, a clear jam release button and simple instructions posted next to the machine avoid a lot of stress.
Temperature control and preset modes
Temperature matters because too much heat can warp paper or cause bubbles, and too little leaves edges unsealed.
There are two main approaches:
- Preset modes for common pouch thicknesses
- Manual temperature control with a dial or digital settings
Presets are easier for casual users. Manual settings give more control if you work with varied media thickness, but they also increase the chance of mistakes.
For most event teams, simple modes keyed to pouch thickness are safer than fine-grain controls that only one person understands.
Build quality and duty cycle
An event laminator does not have to be a heavy industrial machine, but it should feel solid enough to handle bursts of heavy use.
Signs of better build quality include:
- Stable weight that does not slide when feeding pouches
- Metal or reinforced housing rather than thin plastic shells
- Rated duty cycle or recommended maximum daily use from the maker
- Consistent reviews mentioning long term reliability
If you run many events, or a large flagship gathering, it often pays to invest a bit more rather than treating the laminator as a disposable tool.
Safety features for busy back-of-house spaces
Event rooms get crowded and people are tired. Safety features reduce the chance of burns and other small accidents around the laminator table.
Helpful examples:
- Auto shutoff after a period of no use
- Clear “ready” and “hot” indicator lights
- Covered rollers that reduce the risk of contact with hot parts
These details sound minor, but when there are temporary staff and volunteers, any clarity around “on” versus “off” is welcome.
Portability and footprint
Events move. You might set up in a back office, then relocate to a hallway table as registration opens. A bulky laminator that needs two people to carry ends up parked in one room and never used on site.
Think about:
- Overall size and whether it fits on a standard table with a printer beside it
- Weight if you have to carry it across a venue or transport between locations
- Cable length and access to power outlets in typical venues
A compact unit that sits next to your badge printer often gets used much more than a large unit that lives in a separate office.
Buyer guide: matching laminators to event use cases
Instead of starting with models, start with how you actually run events. The right laminator for a small local meetup is not ideal for a big multi track conference with thousands of passes.
For small meetups and workshops
If your events are smaller, with simple needs, a basic pouch laminator usually covers everything.
Typical needs:
- Name badges and speaker passes
- One or two schedule posters
- Simple directional arrows on doors
Key features to look for:
- Support for up to A4 size pouches
- Compatible with 3 and 5 mil thickness
- Fast warm-up time for short bursts of work
This type of unit keeps cost low while still making your events look more polished.
For mid-sized conferences and summits
Once attendee numbers grow, the pressure on your print and lamination workflow grows with them. Last minute badge changes and extra signage become routine.
Needs often include:
- Hundreds of badges, some edited on event eve
- Room signs for multiple tracks or stages
- Clear sponsor branding and table cards
Look for:
- Reliable jam release and reverse functions
- Support for thicker pouches for higher wear items
- Decent throughput measured over an hour of continuous use
At this level, many teams keep a second laminator as backup, or at least have one main unit and a smaller one for overflow or emergency use.
For large festivals, expos, and repeated events
Large events and ongoing series have slightly different needs. The main concern becomes workflow design and long term gear resilience rather than just getting through one event.
You might need:
- Roll laminator access for large feature signage during pre-production
- Multiple pouch laminators on-site across different zones
- Tighter control over quality and consistency of lamination
In this case, consider creating a small “production corner” with:
- One heavy duty pouch laminator for badges and mid-size pieces
- One roll laminator in the office for large posters and persistent signs
- Spare pouches in multiple sizes, clearly labeled and easy to reach
What makes a laminator genuinely good for events
A laminator can have many specs and features, but for events, a few practical factors decide whether it feels like a smart buy.
Consistency of output
You want badges from the first sheet to the last to look similar, with no change in gloss or edge sealing halfway through the batch.
Good units keep:
- Steady temperature across long runs
- Even pressure across the roller width
- Minimal warping on different paper stocks
Forgiving of user error
Events use many hands. Not everyone feeds pouches perfectly straight or waits patiently for warm-up. A good laminator handles mild misuse without failing.
Things that help:
- Wide throat with guides that help align pouches
- Clear beeps or lights for “ready” states
- Simple jam clearing steps printed on the housing
Readability and glare
High gloss lamination can look sharp under some lighting, but under strong overhead lights or stage spots it sometimes causes glare that makes badges and schedules harder to read.
Consider testing:
- Gloss pouches for strong color badges in dimmer spaces
- Matte pouches for signage near bright lights or windows
The laminator itself usually handles both equally well, but your choice of pouches and your test prints will influence final readability.
Maintenance needs
A laminator that demands frequent cleaning or special tools becomes a burden. Lower friction care encourages more frequent use and longer life.
Reasonable maintenance usually looks like:
- Occasional cleaning sheets through the rollers
- Keeping the unit covered from dust when stored
- Allowing proper cool-down before packing away
Pros and cons of using laminators for event materials
Where laminators shine for events
- Protect printed materials from spills, dirt, and general wear
- Give badges and signage a more professional and consistent finish
- Extend the life of reusable materials across repeated events
- Reduce the number of reprints during a multi day event
- Help keep colors strong and text sharp under frequent handling
- Allow quick on-site production of replacement badges or updated schedules
- Make it easier to use cheaper paper while still achieving a solid feel
- Provide a simple in-house alternative to external print shops for last minute needs
Limitations and tradeoffs to be aware of
- Upfront cost of machine plus ongoing cost of pouches or film
- Added plastic use, which may clash with event sustainability goals
- Extra time for warming up and feeding pouches compared to plain printing
- Risk of jams and wasted materials if users rush or misfeed sheets
- Storage space required for machines and different pouch sizes
- Added weight and bulk when transporting production gear between venues
- Gloss glare issues under very strong lighting if pouch finish is not chosen carefully
- Noise and heat output in small rooms already full of equipment
Practical tips for laminating event materials
Once you have the right machine, how you use it makes as much difference as the model you picked.
Plan sizes and templates in advance
Before event season, lock in a small set of common sizes:
- Standard badge size
- Standard door sign size
- Standard schedule board size
Design your templates around these, then stock matching pouches. This avoids last minute trimming or awkward gaps inside pouches that do not fit well.
Batch work by type and thickness
Switching pouch thickness during a hectic print run slows everyone down. Group tasks:
- Do all 5 mil badges together
- Then all 3 mil simple signs
- Then any thicker long life pieces
This keeps temperature settings stable and lowers the chance of feeding the wrong pouch type.
Allow enough margins in design
Every pouch needs a small sealed border around the edge of the paper so the lamination can hold. That means your design should leave a bit of blank margin to avoid cutting into important text.
Check the pouch size and subtract at least a few millimeters on each side when setting up your document sizes.
Train at least two people on jam handling
Do not let only one team member know how to clear a jam. If that person is busy or off site when trouble happens, production stops.
Spend a few minutes showing at least two or three staff members:
- How to use reverse or jam release
- When to power off before clearing
- How a correctly fed pouch looks entering the rollers
Test under real lighting
Before committing to a finish, take a laminated sample to the actual event spaces or at least similar lighting conditions.
Check:
- Can people read text on badges at a distance?
- Do reflections from lights obscure any parts?
- Does the color match your brand expectations when laminated?
Common mistakes when choosing laminators for events
Many teams buy a laminator quickly and only notice the mismatch at crunch time. A few avoidable errors come up often.
Focusing only on price
Low price seems attractive, but if a machine jams often or overheats, the real cost is wasted pouches and staff time. Cheap laminators can work well, but only if they also have a record of reliability and fit your usage level.
Ignoring pouch costs and availability
A laminator is only as practical as its supplies. Some models work best with branded pouches that cost more than generic options.
Look at:
- Price per pouch for your most used sizes
- Availability from multiple sellers to avoid shortages
- Pack sizes that match your event volumes
Choosing a width that is too small
A compact machine is easier to carry, but if it cannot handle common paper sizes you plan to print, you end up trimming or redesigning at the last minute. Measure your most common documents before committing.
Skipping backup options
For anything larger than a simple meetup, relying on one laminator can be risky. A second smaller unit, or a plan with a nearby print shop that offers lamination, removes a single point of failure.
How to compare laminators quickly
When reading product pages, it is easy to get lost. A simple comparison grid helps cut through the noise.
| Criteria | Questions to ask |
|---|---|
| Size support | Does it handle all document sizes planned for badges and signs? |
| Thickness range | Can it seal at least up to 5 mil pouches for durable badges? |
| Speed | Is warm-up and feed speed enough for peak production windows? |
| Jam handling | Is there a clear jam release or reverse function? |
| Durability | Do long term users mention reliability across many jobs? |
| Ease of use | Can volunteers understand the panel and status lights without training? |
| Supply cost | Are pouches affordable and easy to restock at volume? |
Frequently asked questions about laminators for creating durable event materials
Do event laminators really make badges last longer?
Yes, lamination adds a tough plastic layer that resists moisture, bending, and surface wear. For events where badges rub against clothing, bags, and lanyards all day, this extra layer stops ink from smudging and corners from tearing. Many teams reuse laminated staff cards across multiple events.
What laminator features matter most for durable event materials?
For durable event materials, focus on support for thicker pouches, stable heat, and solid rollers. A machine that handles 5 or 7 mil film with consistent temperature will give badges and signs a firmer, more long lasting finish. Jam release and clear temperature indicators help maintain that durability over time.
Which pouch thickness is best for event badges and passes?
For most badges and passes, 5 mil provides a good balance between flexibility and strength. It feels sturdy in the hand and stands up well to full day wear. For VIP or long term access cards that need to last across many uses, some teams step up to 7 or 10 mil to get a near-card like feel.
Is a small laminator enough for large event signage?
A small pouch laminator can handle many types of signage if the designs stay within its width limit. For large corridor signs, stage backdrops, or wide maps, a roll laminator or outsourced lamination is usually more realistic. Many teams use a mix: in-house lamination for badges and smaller signs, external services for very large pieces.
How many laminators are needed for a conference?
The number depends on your schedule and how much work happens on site. For a mid-sized conference, one main laminator plus a backup or small secondary unit covers most needs. If you do many last minute badge changes during registration, placing a laminator directly near check-in reduces walking time and bottlenecks.
Are laminators for durable event materials eco friendly enough?
Lamination adds plastic, so it is not the most eco friendly option by default. Some teams balance this by limiting lamination to items that are reused or that must survive heavy wear, such as staff badges and core directional signage. Reusable generic signs with changeable inserts can reduce waste over repeated events.
Can laminators handle thick card stock for event signs?
Many pouch laminators can work with moderate card stock, but each model has a limit on overall thickness of paper plus film. If you plan to use very thick stock, check the specifications for maximum total thickness. Testing a sample before a big production run is always wise.
What is the best way to avoid bubbles and wrinkles when laminating event materials?
The most reliable way is to keep pouches clean, feed them straight, and ensure the laminator is fully warmed up. Placing the printed sheet carefully inside the pouch, with no dust or small scraps, reduces trapped air. Webbing or wrinkles often appear when the pouch shifts during feeding or the rollers are not yet at even temperature.
Should durable event materials use matte or gloss lamination?
Gloss lamination tends to make colors pop, which many brands like for badges and small signs. Matte lamination reduces reflections and fingerprints, especially useful under bright lights or on large format signs. Some teams mix both, using gloss for badges and matte for schedules or directional boards.
Is it better to buy a laminator or send event materials to a print shop?
This depends on how often you run events and how much last minute change you face. For a single small gathering, a print shop might be simpler. For recurring events, or where names and agendas often change shortly before doors open, owning a laminator gives more control and reduces rush fees.
So which laminator setup fits your event style best?
For some teams, a simple compact pouch laminator by the badge printer is enough. Others benefit from a heavier duty unit and a clear workflow that handles large batches calmly.
The core question to ask is: how often do event materials change at the last minute, and how long do they need to last? Once that is clear, choosing the right laminator becomes a lot more straightforward.