
If you are tired of messy rooms, busy offices, or random clutter ruining your video calls or streams, a portable green screen can feel like a simple fix that suddenly makes everything look professional. Finding one that is stable, easy to move, and does not look cheap is the real challenge though, so here are the top options worth a look based on real user feedback:
Our top portable green screen picks
These are carefully chosen based on build quality, ease of use, and how good they look on camera. The list updates automatically so you always see what real buyers are actually happy with.

- ✅【Larger Size】 Our professional chroma key green screen is easy to contain two people with its large size of 78.7”(W) x 82.7”(H).

- Wide Used & Note & Package Content: 1)JEBUTU green screen backdrop with stand kit is a good alternative product for professional background screen. Suitable for streaming, portrait photo,interview setting, broadcast, film making, photography shooting, video shooting, etc 2)Package included: Green Screen Backdrop x1,T-shape Backdrop Stand x1,Carrying Bag x1,Backdrop Clip x5
- 【Ultra Quick Set Up】Latches and hydraulic tub has been improved, green screen build a studio in a few seconds, truly immersive broadcasting

- Reverse Folding Stand: Highly portable, comes with a carry bag for easy transport. Larger unfolding area, better stability and compact storage than conventional stands. Quick intuitive setup saves time, rock-solid stability for worry-free use

- Greenscreen Backdrop: this green screen cloth is great for covering out the real background and completing background replacement through post-processing. Idea for chroma keying, live streaming, photo and video shooting.
Why portable green screens matter more than you think
Portable green screens used to be a niche thing only used in studios. Now they sit behind laptops, gaming chairs, office desks, and even in tiny bedrooms. The goal is simple: create a clean, consistent background that gives you control over how you appear on screen.
Whether you are streaming, recording training videos, teaching online, or just want to hide the laundry basket behind you, a portable green screen can do more for your image than any new webcam. It does not magically fix bad lighting or poor audio, but it gives you a strong foundation.
A good portable green screen is less about fancy features and more about reliability: it must stay flat, stay upright, and stay out of your way while you work.
Many people rush and buy the cheapest option, then struggle with wrinkles, weird shadows, and a frame that tips over if someone closes a door too hard. This guide walks through what to look for, what to avoid, and how to pick something that fits your space and workflow.
Key types of portable green screens
Not all portable green screens work the same way. The right style depends on your room, how often you move it, and whether you sit or stand during your recordings.
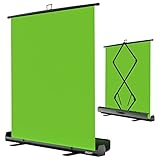
1. Retractable floor-based green screens
These look a bit like pull-up banners used at events. The screen rolls into a hard case at the bottom and pulls up when needed.
Typical traits:
- Hard metal base that sits on the floor
- Screen pulls up and locks onto a support bar
- Packs down into a long case for storage
Good for people who want a clean, quick setup without permanent mounting. These work well for home offices and shared spaces because they can slide behind furniture when not in use.
2. Collapsible pop-up green screens
These are the foldable fabric panels that snap open and fold into a circle when stored. Many are double sided with green on one side and blue on the other.
Typical traits:
- Lightweight steel frame sewn into the fabric
- Folds into a small round bag
- Often leans against a wall or mounts to a stand
Great if you move around a lot or record in different rooms. The downside is they can warp or ripple if stored poorly, and they sometimes need an extra stand or mounting kit to keep them in the right place behind you.
3. Wall or ceiling mounted roll-down screens
These work like projector screens. The green fabric rolls up into a tube and pulls down when needed.
Typical traits:
- Fixed mounting to wall or ceiling
- Pull-down mechanism with spring or chain
- Stays in one room permanently
Best suited to a dedicated recording space. They are not as portable as the other styles, but they give a very consistent surface if installed correctly.
4. Large fabric backdrops with stands
This style uses separate tripod stands and a horizontal bar, with a large sheet or roll of green fabric clipped to it.
Typical traits:
- Adjustable height and width
- Backdrops can be swapped out easily
- Bulky to store, but flexible for bigger spaces
These work well if you need a wider scene, for example full body shots, product demos, or group videos. They are less suited to tiny rooms, because the stands can eat into floor space and trip you up.
What actually makes a portable green screen “good”?
Many product pages use the same generic claims, so it helps to focus on elements that really affect your daily use.
1. Size and coverage
One of the most common mistakes is buying a screen that is too small. The camera does not care that the screen is “large” in the description. It only cares what is inside the frame.
| Use case | Screen size recommendation | Notes |
|---|---|---|
| Seated webcam calls | At least 1.3 m wide, 1.5 m tall | Enough to cover the area around head and shoulders |
| Standing presentations | At least 1.5 m wide, 2 m tall | Prevents floor or ceiling from peeking into frame |
| Full body, wider framing | 2 m wide or more | Better for product demos and movement |
If the edges of the frame show anything except pure green, you will spend more time masking and cropping than actually recording.
Before buying, sit or stand where you plan to record and roughly measure how much area sits behind you within the camera frame. A quick phone photo can help you picture the coverage you need.
2. Fabric quality and color consistency
The fabric should be opaque, non-reflective, and evenly colored. Shiny or thin material can cause hot spots or let light bleed through from behind, which makes clean keying much harder.
Look for:
- Matte finish to reduce reflections
- Thick enough so nothing shows through, even with a light behind it
- Consistent green from top to bottom, no visible fading or patchy areas
Some screens advertise “wrinkle resistant” fabric. That helps, but very thin material that packs super small can still crease easily. Wrinkles show up as shadows or dark lines that are hard to remove in software.
3. Frame strength and stability
A portable green screen cannot help you if it keeps leaning, wobbling, or falling over during a session. This is where many budget options cut corners.
Things to check:
- Weight of the base or stands so it does not tip over easily
- Locking joints or telescopic poles that feel firm when extended
- No obvious bending or sagging when the fabric is under light tension
A slightly heavier frame can be a plus, especially for retractable or stand-based models. The tradeoff is that carrying it around gets harder, so think honestly about how portable you really need it to be.
4. Ease of setup and storage
Many people underestimate how often they will set up and pack away the screen. After a long workday, wrestling with clamps and tangled fabric feels like a chore, so the screen stays in the corner and does not get used.
Good signs:
- One person can set it up in a few minutes
- Clear mechanism, no complicated tightening sequence
- Storage case that actually protects the screen instead of just wrapping it
If you are recording daily, small setup hassles add up. A quicker pull-up or pop-up system might be worth a higher price just to keep your routine simple.
5. Portability and weight
Portability is not only about weight. Length, shape, and how it fits in a car or on public transport matter too.
Ask yourself:
- Does the packed size fit in your car boot or behind a desk?
- Can one person carry it comfortably through doors and stairs?
- Is the carry handle or strap strong and comfortable enough?
Pop-up styles shine here, since they fold into compact discs. Retractable floor models tend to be longer and heavier but more self-contained and protected.
6. Compatibility with your software and lighting
Any green screen should work with common software, but certain factors make the key much cleaner.
A few things matter:
- Flat, even color that your software can detect easily
- Enough space to keep you at least 1 to 1.5 meters away to reduce green spill
- Ability to light the screen and your face separately
If you sit too close to the green, you may notice a faint green glow on your shoulders or hair. Good lighting plus a slightly larger screen helps reduce this problem.
Pros and cons of portable green screens
Where portable green screens really shine
Portable green screens solve several practical problems at once.
Main advantages:
- Let you create a clean, controlled background in almost any room
- Work with common video tools and conferencing platforms
- Can be packed away when you need the room for something else
- Give you freedom to use custom virtual sets, brand colors, or graphics
- Offer privacy by hiding your home or work environment
- Reduce visual distractions for viewers and students
- Cost less than major room renovations or dedicated studio builds
- Help maintain a consistent look across different recording days and locations
- Encourage better framing and camera awareness because of the limited space behind you
Limitations and downsides to keep in mind
Portable green screens are not magic and they do bring some tradeoffs.
Common drawbacks:
- Need some space between you and the screen to work really well
- Require at least basic lighting to avoid harsh shadows
- Can wrinkle or warp if stored badly or folded incorrectly
- Cheap frames may wobble, lean, or collapse after repeated use
- Wide shots can be tricky if the screen is not large enough
- Setup and pack-down time can feel annoying if you record often
- Background replacement still depends on your computer and software performance
- Noise from unfolding mechanisms or stands can interrupt live calls if done last minute
- Some models are visually bulky and may not blend into a small home office when stored
A portable green screen is a tool, not a cure-all. Good lighting, framing, and audio still matter just as much for a professional look.
How to choose the right portable green screen for your setup
Step 1: Map out your recording space
Before looking at options, stand where you usually record and check three things: distance to the wall, available width, and ceiling height. A quick sketch with rough numbers can prevent many headaches later.
Key questions:
- Do you sit, stand, or switch between both?
- How far is your chair or standing position from the wall behind you?
- Is there room for a floor base or tripods without blocking doors or drawers?
If you are tight on depth, a wall mounted pull-down or thin retractable base close to the wall will help. Bigger rooms can handle deeper backdrop stands.
Step 2: Decide how portable it really needs to be
Some people think they need maximum portability, but in practice the screen never leaves the same corner of the room. Others travel between offices or client sites and truly need something light and compact.
Rough guide:
- Mostly fixed in one room: wall or ceiling roll-down, or heavier retractable floor unit
- Used in different rooms in the same building: retractable floor or pop-up with stand
- Travel between locations: collapsible pop-up stored in a padded case
Honest answers here help avoid paying for features you do not use or buying something too fragile for constant movement.
Step 3: Match the screen type to your style of content
For talking head videos and regular video calls, you only need to cover a narrow window around your upper body. A compact retractable or pop-up screen is usually enough.
If you film tutorials that show hand movements, whiteboards, or physical products, you probably need more width and height. In that case, a larger backdrop with stands or an extra wide pull-up model can be better.
For gaming and streaming, remember that camera framing often shows a bit more to the side, especially with wide-angle webcams. A narrower screen can lead to corners of the real room leaking into shot when you move slightly.
Step 4: Pay attention to user feedback on wrinkles and sagging
Product descriptions rarely admit that a screen sags or creases over time, so this is where user reviews become very useful. Repeated remarks about stubborn wrinkles or a frame leaning forward should not be ignored.
Look for comments that mention:
- How flat the screen stays after weeks or months
- How hard it is to fold and unfold without twists
- Whether the fabric stretches or loosens with repeated use
Screens that arrive tightly packed may need steaming or careful ironing before first use. Not everyone has time for that, so consider your patience level here.
Step 5: Consider add-ons and upgrades
A basic screen can be improved a lot with small extras.
Examples:
- Clamps to pull fabric tighter on backdrop bars
- Sandbags to steady tripod stands on slippery floors
- Softbox or panel lights to even out shadows on the screen
- Hooks or brackets for wall mounting pop-up screens behind a desk
Sometimes a slightly cheaper green screen plus a few smart accessories beats a more expensive all-in-one kit.
Lighting tips for portable green screens
Good lighting matters as much as the screen itself. The goal is to keep the green surface evenly lit and separate your subject from the background.
Basic lighting setup
For many home setups, a simple approach works well:
- Two lights pointed at the screen from each side, at roughly the same power
- One main light on your face, placed slightly to the side to add shape
- Some distance between you and the screen to reduce green spill and shadows
If you only have one light, aim it at your face first. Then increase the camera gain a little and move closer to the screen to keep it bright enough, while still watching for harsh shadows.
Avoid common lighting mistakes
A few issues show up again and again in chroma key setups:
- Strong ceiling lights directly above your head create harsh shadows on the screen
- Coloured light hitting the green surface can shift its tone and confuse the keying tool
- Very strong light behind the screen can shine through thinner fabric and ruin the effect
Adjusting light placement by even a small amount can fix many of these problems without new gear.
Positioning, distance, and camera settings
How far from the portable green screen should you sit?
Many guides recommend at least 1 to 1.5 meters between you and the screen. This helps reduce spill and keep shadows softer. With very small rooms, that distance may not be realistic, so you might need to rely more on careful lighting and tighter framing.
Try to keep your chair or standing spot fixed once you have a good distance. Marking the floor with tape helps if other people use the room and move things around.
Camera angle and field of view
A wide-angle lens shows more of the room, which means more of the green screen. That is fine if your screen is large enough, but it can show the edges very easily if it is not.
If you cannot upgrade the screen size, adjusting the camera zoom slightly or cropping in your streaming or recording software is often the easiest fix. This does not need to be dramatic. A small crop can hide the edges completely.
Software settings for best results
Most conferencing or streaming tools have basic chroma key settings, even if they hide under different names. Look for controls related to key color, similarity, smoothness, or spill suppression.
A stable, well lit screen lets you use a lighter touch with these settings. That means less halo around hair and fewer jagged edges around shoulders or hands.
Using portable green screens in different scenarios
Remote work and professional meetings
For business calls, the goal is usually subtle: clean, neutral backgrounds that do not distract. This might mean a soft blurred office image or a simple branded backdrop.
Tips for remote work use:
- Avoid very busy or flashy virtual backgrounds
- Stick to calm colors and minimal movement behind you
- Make sure your head does not clip through the virtual background when you turn or lean
A neat, consistent background can quietly raise the perceived quality of your presence on calls without drawing attention to itself.
Streaming and content creation
Streamers often want the exact opposite: they want personality, overlays, and visual effects. Portable green screens let you crop your body into a game scene or custom layout.
Things to keep in mind:
- Movement exaggerates any keying issues, so test with your normal gestures
- Bolder lighting on your face can help you stand out from bright virtual scenes
- Make sure your chair color does not match the green or it may disappear partly
Many streamers upgrade their screen before their camera, because the impact on the final visual is so noticeable.
Online teaching and training
Teachers and trainers can use portable green screens to place themselves in front of slides, whiteboards, or diagrams. This can help keep attention, especially during longer lessons.
Use cases:
- Standing in front of large virtual slides instead of sharing screen only
- Switching between a physical whiteboard and a digital one without changing rooms
- Recording reusable training modules that match your live sessions
In these cases, reliable setup that works day after day is more valuable than fancy features.
Care, maintenance, and longevity
Keeping fabric clean and flat
Green screens collect dust, especially if they roll up or fold often. Dirt spots and stains may show up on camera more than expected, depending on lighting.
Basic care practices:
- Wipe the surface gently with a soft cloth from time to time
- Avoid greasy or wet hands when handling the fabric
- Fold or roll the screen according to manufacturer instructions to prevent random creases
If wrinkles show up, hanging the screen for some time with slight tension and low heat from a steamer can help. Strong ironing on high heat can damage synthetic fabrics, so be careful.
Protecting frames and mechanisms
Retractable mechanisms and tension frames do not like being forced. Make sure all locks release before closing a retractable unit, and do not twist pop-up frames when folding.
Stands and support bars last much longer when:
- They are not overloaded with extra heavy backdrops
- Joints are tightened firmly but not over tightened
- They are stored in dry spaces away from moisture that could cause rust
Frequently asked questions about portable green screens
Do portable green screens really look professional on camera?
Portable green screens can look very professional if two conditions are met: the fabric is flat and evenly lit, and the lighting on your face is balanced. When those are in place, most viewers cannot tell if you are in a studio or a spare bedroom.
What size portable green screen is best for seated video calls?
For seated calls, a screen around 1.3 to 1.5 meters wide and at least 1.5 meters tall usually covers the area behind your upper body frame. Wider is helpful if you move a lot or use a wide-angle webcam, but this range works for many home offices.
How far should you stand from a portable green screen?
Staying about 1 to 1.5 meters away from the green screen gives better results. This distance reduces green spill on your hair and shoulders and softens shadows. If your room is smaller, focus on good lighting and a tighter camera crop to compensate.
Can a portable green screen work without extra lighting?
Natural light or ceiling lights may be enough in some rooms, but results can be inconsistent. Portable green screens look more reliable when you use at least one dedicated light on your face and, ideally, separate lights for the screen itself. Consistent lighting is the difference between a rough effect and a clean, believable background.
Is a blue screen better than a green screen for portable setups?
Green usually works better for most people because cameras are more sensitive to green and most clothing does not match it. Blue can be useful if your scene or brand design uses strong green elements. Many portable screens are double sided, so you can choose based on your outfit and scene on any given day.
Why does my portable green screen look patchy or uneven?
Patchy color often comes from uneven lighting, wrinkles, or thin fabric letting background light pass through. Try adjusting your lights to cover the surface more evenly, smooth out visible creases, and block strong light sources behind the screen. If the fabric itself is inconsistent in color, there is only so much software can fix.
Do you need a powerful computer to use a portable green screen?
Basic background replacement in conferencing tools does not demand much, but higher quality chroma keying with high resolution video can stress older laptops. If you notice lag or dropped frames when adding the green screen effect, lower the resolution slightly or close other heavy apps while recording.
Can a portable green screen help small content creators stand out?
A portable green screen will not fix weak content, but it can lift production quality and make videos more pleasant to watch. Clean framing, consistent backgrounds, and flexible layouts give your audience one less distraction and help them focus on what you are saying.
Final thoughts: is a portable green screen worth it for you?
For many people, a portable green screen is one of those tools that quietly changes how professional their content or calls feel, without needing a full studio or a perfect room. It adds structure to your framing, gives you creative control, and can make even simple webcams look far more polished.
If you record or stream often, the right portable green screen can feel less like an accessory and more like part of your basic workspace, just like a decent microphone or chair.
So the real question is not whether portable green screens work. They do. The better question is: does your current setup limit how you want to appear on screen, and would a clean, flexible background help you communicate more clearly?
If the answer is yes, then choosing a solid, reliable portable green screen, matched to your space and style, is a practical next step rather than a luxury.